Approach and Threshold

Approach and Threshold (D2)

by Lorien Hall


Approach and threshold, two words when consciously combined then materialized, have the potential to create powerful or meaningful experiences. For our purposes, the transition from the interior space of the house into the exterior space of the garden will be the approach and threshold discussed and applied. And in this context it is the task of the garden designer to create or develop this transition.

A universal occurrence that everyone experiences when moving from inside to outside, or from house to garden, is a shift in the five senses: sight, sound, touch, taste, smell. Once the hand is placed on the door handle and pulled or pushed open – or a hand pushes aside the textile of an ancient hut, a shift in the senses begins...we step through the door frame...past the textile...and at that very moment of moving from shelter into exposure we are experiencing approach and threshold.

The experience of transition can be multiple; abrupt, dramatic, subtle, seamless, fluid, gradual, drawn out, obvious, understated and so on. It is what we make it to be, realizing that we can do it with purpose, or leave it to default. The latter being something a proper garden designer should never do.

In Design 2, there are essentially five opportunities for approach and threshold (this only applies to “from house to garden”, as there are potentially many more thresholds to consider and develop on the site). What will be the function and importance of each of these opportunities? What could be the experience? How can that be created?


1) Back of Kitchen (side of house): this is to be the main entrance/exit from the house for the homeowner and guests alike. And while this approach and threshold doesn't overtly include the garden, per se, the experience shall be simple, inviting, and respectable in an effort to make users feel comfortable and appreciated. This is to be accomplished by making the transition obvious through ground plane materials, door style and color, plant material and lighting. Nothing too overwhelming.

2) Kitchen: this will probably be the second most used set of doors (possibly the most used for the owners themselves?) and will land immediately in the garden. Relaxing yet invigorating, refreshing, life-giving with a sense of wonder and gratitude...these are the attributes to develop from this threshold by first being greeted by a generous landing to stand on and directing views out and around the expanse of the garden, followed by a step down to the breakfast terrace integrated with an herb garden to reflect the goodness that comes out of the earth.

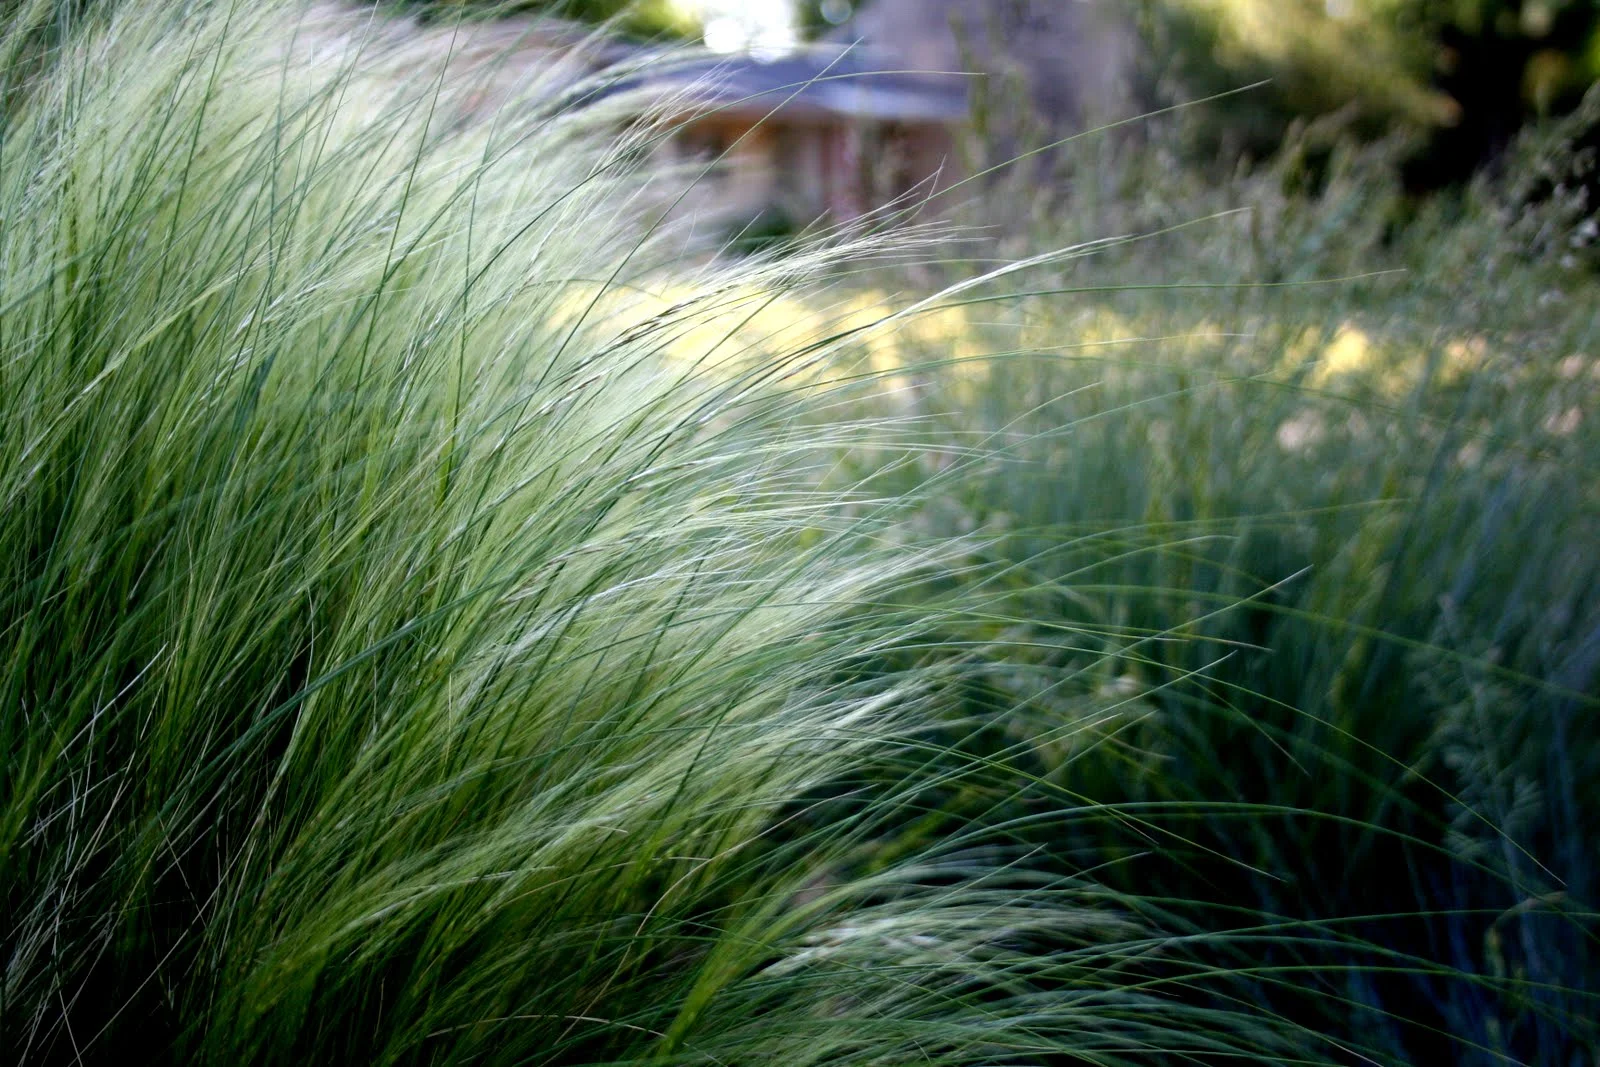
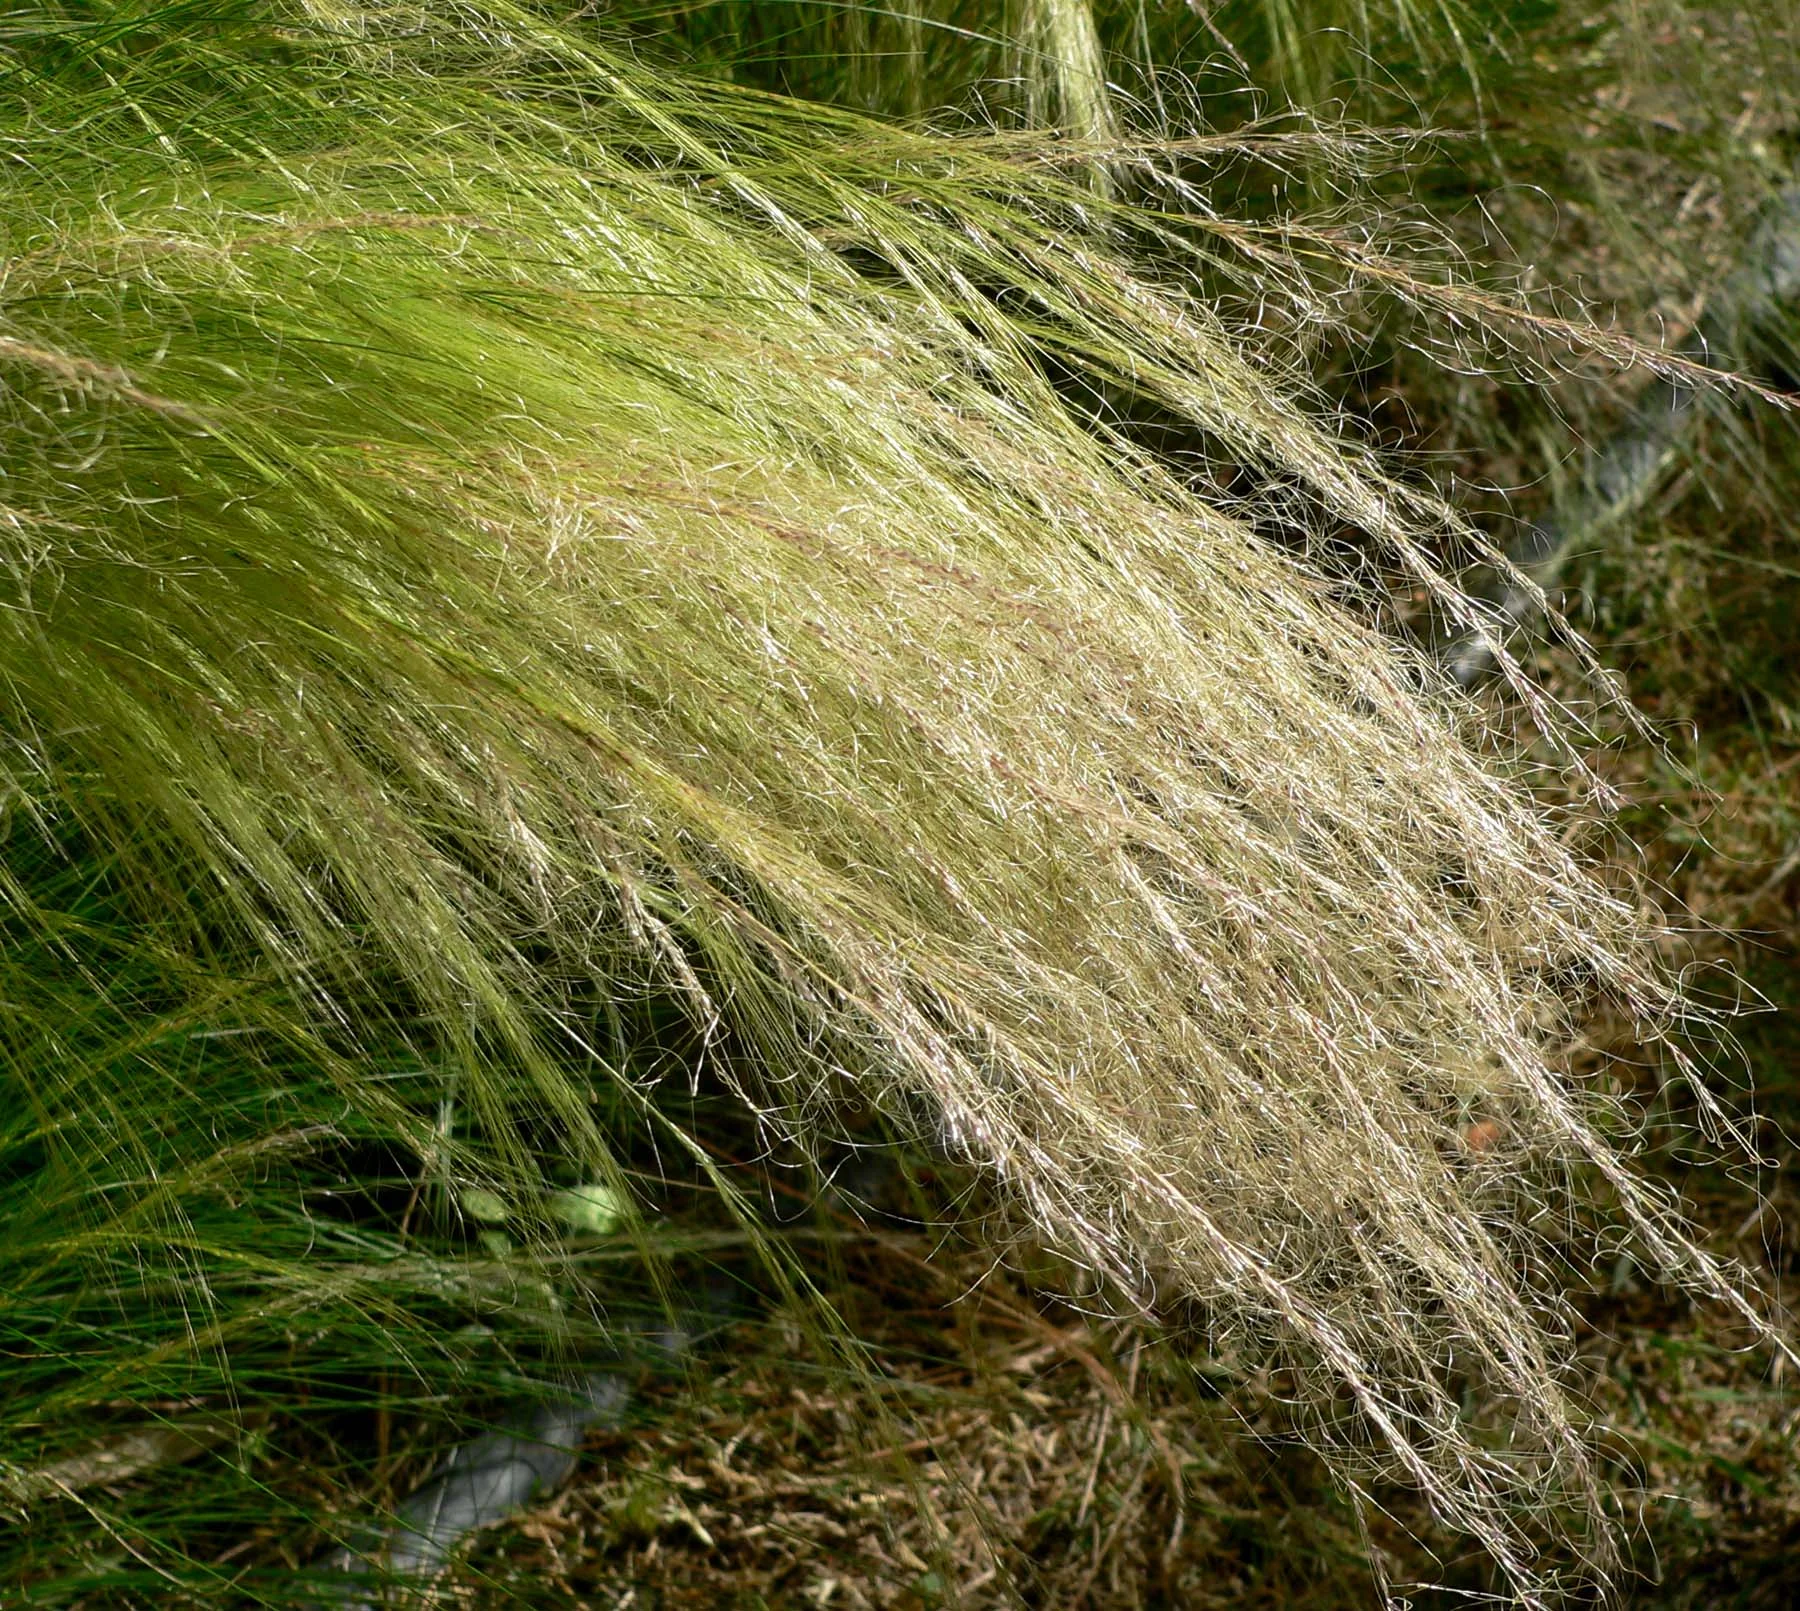
3) Back of Dining Area: when formal outdoor dining is called for, this is the door for the job. Leading out into a meadow adjacent the house with the dining table placed amidst the grasses, wildflowers, small specimen trees and Buxus clouds, this will make for a threshold that is curious yet delightful with a hint of the whimsical.

4) Formal Entry Hall: this door shall be used minimally, but will share in the same delightful experience of leaving the inside dining area, as it leads out into the same area. There will, however, be one enhancement - and that is a bit of mystery. From the doorway, an arbor/pergola shall extend away from the house and support a vine appropriate to the hours of sunlight received in that area so that when one opens the door, the threshold extends and one is enclosed for just a second before entering full outdoor exposure.

5) Drawing Room: This will lead directly into the conservatory – however, an analysis of the approach and threshold from the conservatory into the garden should be developed further.

Any approach from inside the house that includes windows or glass in the doors, will in essence, start the moment that the eye looks out into the garden. At that moment the mind will start to shift the senses, and the anticipation of moving through the threshold is set in motion. 

I Wish I Would Have

Something I have realized since coming to the Inchbald is the great value of becoming familiar with other garden designer's work.

I wish I would have understood this a decade ago. 

Partly I avoided others work because I felt that I was supposed to come up with original ideas all on my own - without the influence of another designer. I thought if I was a real designer, I would come up with the next best idea solo. Well how ridiculous is that? 

I have always sought to be influenced and inspired in my designs by what surrounds me…leaning heavily towards music, architecture, travel, and nature itself. I felt those were noble and acceptable influences to be inspired by. But I always dismissed other garden designers, not wholly - but enough that now I feel I am playing a much needed game of catch-up. The game of who-is-who-and-who-designed-what.

So to all budding and beginning designers, I plea - get to know your designers - past and present! Research their work, know what makes (or made) them tick - what drives their designs, their opinions and their likes/dislikes, etc...and it's not so you can be them, or even be like them - but it's so you can be inspired by them. And in your journey of discovery - I believe that there will be one designer, one designer above all others that will emerge, whom you will be surprised at what you learn about them and their designs. And that one designer is you. 

As I have been reading and studying the works of other garden designers in an honest effort to get to know them and their designs, I have been surprised at how it has helped me get to know myself as a garden designer - and to see how my development is evolving into something that is indeed, unique to me. The irony lies in that the very thing I was avoiding in order to keep my individuality in my profession, is actually a force in discovering my distinctive essence as a garden designer.

Go figure. 

The Difference You All Made

I grew up skipping rocks on a small reservoir across the street from my Grandmothers house. Sometimes the rocks, though smooth on one side, seemed to jolt themselves into the water with a "plunk". One big "plunk." 

But other times the rocks soared…1, 2, 3, 4, 5…..I think my all-time record is somewhere around 11, maybe 12 skips. Not only was it magical to watch the rock bounce across what seemed to be an impossible surface, but the aftereffect of seeing all those rings of water rippling outwards in perfect concentric circles was mesmerizing. 

A few weeks ago I received an email. The kind that surprises and delights! I love those kinds of emails and I must say I have received my fair portion since arriving in London. 

Hi Lorien, 

I hope all is well. I'm an American fashion illustrator and I lived in London on and off for two years while studying at an American design school, AIU London, located near Marlyebone. I decided to start studying at London College of Fashion but I qualified for no financial aid because this isn't my first degree and so on…so I went to GoFundMe, but I seriously doubted that I could raise such a huge amount until I found your campaign! I was so inspired and your courage gave me the confidence to get it started. I started in June and 3.5 months later I reached my goal and I'm at the London College of Fashion! So I want to say THANK YOU! I know you probably had obstacles with your campaign, but you did it and that helped me. Let me know if you'd like to grab a coffee sometime. 

 - Kris Keys

Lorien Hall, garden designer and Kris Keys, fashion illustrator

Lorien Hall, garden designer and Kris Keys, fashion illustrator

She sent this email to me - but really it's for all of you - all of my supporters and GoFundMe contributors!!! So THANK YOU! For not only realizing my dreams, but the dreams of others who were motivated by what happened last June and July. And the rippling effect will continue from here, I know it! There are others still, who after seeing the success of my crazy campaign, were more enthusiastic to move forward, progress, take a chance….you never know until you try. 

Did we meet up?

Yes - after one failed attempt (I was mentally lost in a project and totally left her waiting - bless her heart!!!) we did meet up! And we ended up talking for hours about our experiences. How similar they were! The struggle it was to ask for money. The hard days and the great days. How you just had to keep going and persevere even when it seemed truly impossible. The unexpected sources for funding. The experience of putting yourself out there in front of everyone and feeling SO vulnerable. Incredibly vulnerable. I told her that some days I literally hid under my covers, so anxious about my campaign and thinking I wanted be invisible. But the following day I would get out of bed and say, "Right. I have got one chance and this is it. I take it or leave it. I have to believe I have done this." There were a lot of pep-talks in the mirror. So we made those uncomfortable phone calls, sent emails, texts, person-to-person talks….Kris Keys even went on TV. We both worked very, very hard. The miracles and blessings came. And because of all of you and so many others - we both made it! We are both here.

Check out Kris Keys Go Fund Me Campaign and watch her awesome video to get to know her - she a talented lady with a bright future! And someday you'll be seeing her pieces on the runway... 

One of her illustrations which I love

One of her illustrations which I love

So thank you once again for the difference you made. 

Xoxo, 

Lorien

Nature's Color Palette

At the very beginning of the school year at the Inchbald we went to the Tate Modern for a color exercise. Part of our task was to create a color palette from a painting - to study what colors the artist had used and combined to create the effect they did. Part of the motivation was to help us see how we could develop color palettes for gardens we would design. 

What became apparent as I looked at several paintings in depth was what you think you see isn't always what is really there. Not a new concept, but when recognized the real work of seeing begins. Sometimes it took me great effort to really see the color as it really was. And even then…(as color is affected and appears to change depending on the color it's next to).

When I was at the National Portrait Gallery a few weeks ago sketching, the tutor came around to my area and started talking about a particular painting and referred to the shadows as being very blue…I strained my eyes to see. Hmm. I even went up afterwards to get a closer look. Hmm. His trained and practiced eye could see something I couldn't.

I would like to develop a keen eye for color - and create fascinating combinations. I have always thought nature would be an exceptional source for this and have paid attention off and on to nature's palettes - especially when it comes to lichen and bamboo.

When I saw these examples of quite literally creating color swatches from nature, I was on board. I think it will be a great exercise and design tool for future gardens and paintings.

The Art of Walking

For a Postgrad project at school we were to walk a familiar route and in some way record our experience. I decided to record my walk in photographs and then turned those photographs into a video. I found it interesting that my observations and learning took place mostly post-walk…while sorting out how to make this little video. I am pleased with the final conclusions I rested upon. I warn you that after the video there is ample text, not required reading…just supplemental...

The Art of Walking by Lorien Hall

Reflecting: What I Learned

Destination Matters: Where We Are Walking to Makes a Difference

Where we are walking to makes a difference in how we feel during our walk. The walk to the front gates of Disneyland would surely carry a different tone and weight to it than the walk to the cemetery to bury our loved one. I became particularly keen on the idea of the walk home. There's a warmth which accompanies the walk home...and when it follows on the heels a long day at work or school, there seems to be an added anticipation to that warmth. I believe this is because of what home, or the symbol of home, means to most people: warmth, food, love, shelter...the basic needs of life that makes us feel stable in the world. Even when you are out for an evening wander to nowhere in particular, you know at the end of that journey home is the ultimate destination. In contrast, there may be unpleasantries at home and your walk is to escape or avoid them, then the walk may carry a bit of heaviness to it, knowing that your destination is a difficult situation.

So unless you are Bilbo Baggins going on an unexpected journey, without knowing when or where you will end up (which would have an energy of it's own), most of us know where we are going, and that can influence how we feel.

Materials Beneath Our Feet Matters: Changing Materials Can Change Attitude

As I walked home, the materials beneath my feet changed at least 289 times. And a change in material also means a change in texture, pattern, color, and size. We feel all of those changes with our feet and subconsciously, with our brains. How it exactly changes or stimulates our brains, I don't know, but I assume it does. From personal experience, and even during this particular walk, changing of materials made my walk more interesting visually and physically – it also affected my mood.

There is this certain part of the journey, just after Buckingham Palace, where I walk down the Mall. This tree-lined thoroughfare has more than one type of surface to tread on and I am always drawn towards the softer, loose material as it reminds me of walking down a country road, yet I am in the middle of London. That juxtaposition makes me smile and I feel rather imaginative during that portion of the journey.

Community Matters: Walking Connects Us to Others Present & Past

I have an image in my mind's eye about walking and the art thereof – and it's two-fold...present and past. First, the present. When I think of global community my mind goes to those events that captures the attention and hearts of millions of people around the world at the exact same moment...there is a certain energy associated with this. To me, the moving personal stories and professional records which are broken at the Olympic Games have this power. Also, my mind is taken to the miraculous events when 33 mine workers in Chile surfaced after being trapped beneath the earth for more than two months. The world watched live as each one emerged from the unfathomable darkness – it was riveting. And we all felt it together.

This sense of community is felt and cultivated on all levels, from global to familial. With walking, especially in a city like London where walking is commonplace, there is a sense of community with those who also walk. And though walking is not as dramatic an event as those mentioned above, there is something unifying as you look around and see who you share the ground plane with...invisible ties between all of our feet.

Second, the the past. Each time we take a step, we are physically connecting to the environment we are surrounded by. Sometimes it's the only physical contact we have, our feet to the ground. But in those very moments of walking and moving forward with our lives, may we aren't just connecting to the pavement beneath our feet, and to those immediately around us. We are also reaching back in time and connecting to the worlds and lives that have stood where we now stand, and have walked where we now walk.


The Story Behind the Making of the Video

When I was deciding what to do for my “Art of Walking” experience, I wanted to come up with a clever walk – a “cool” walk. But all the vague ideas moving around in my head were becoming too contrived, when what I was really wanted was a sincere experience, a walk that would mean something to me once completed.

The route I take most often in London is from home to school and from school to home. I live on Shaftesbury Avenue and there's a stop right outside the door of my building where bus 38 stops. Within 15 minutes I am at Victoria Station and 5 minutes after that - studio. I had actually never walked between these two destination points, home and school, even though it's a simple 30 minute journey (something foreign to many Americans...to walk for 30 minutes to get somewhere). So, being encouraged by the assignment, one day after school I decided to skip the bus and see what the fantastic streets of London had in store. And that's when the excitement and the planning began.

I was to photograph my walk, a visual documentary – but somehow wanted an approach with purpose. I planned for my view to be from a snake's perspective and would take a photograph each time my course changed direction and then contrast it with eye level photographs. I thought maybe I could present these images in a video format with a song in the background or something...I still wasn't quite sure about all of the details but I figured they would sort themselves out as all design does in the process of it.

Originally I wanted to do the walk on a school day (back to the authenticity of it all) – but it ended up being on a Saturday. At first this put me in a poor mood and I felt that the whole experience was going to be tainted. I took the bus to Victoria Station and there curbed my frustration with a warm sandwich.

Once I reached the front stoop of the Inchbald I was feeling more optimistic and was actually glad no one was around as I started on my walk. There on the stoop I decided I would also include a photo looking straight up at the sky plane, as well as looking straight down at the ground plane and include my boots to give the photograph scale and a human element. After a few shots I decided to eliminate the sky plane due to my camera not taking the shot every time I pointed it upwards...and about 20 minutes into the walk I also abandoned shooting from a snake's perspective due to a lack in photography skills and time.

By process of elimination I was left with taking a photograph of my boots on the ground plane every time I stepped onto a different material. I wasn't sure what I was after exactly, but as a landscape and garden designer I figured that focusing on different materials we walk and stand on could be of use for future designs.

My walk home normally takes about 30 minutes and after an hour I was only halfway home. Dusk was settling in so much so that my camera couldn't capture crisp images anymore. I was tired and cold and a bit frustrated at this point as I felt increasingly disconnected from the environment around me. Here are the notes I took during that journey:

Nov 2, 2013: Walking Home From School................................Start Time: 3:55pm …...............

Photographing the Journey: Feet on Pavement, Snake View, Looking up; Picture taken at every turn

Walking Home: sense of satisfaction: going to where you are loved

At 4:47pm I am running out of daylight for photos, I reached Buckingham Palace

I got lost. It was getting boring. I felt disengaged. I felt less human. I felt numb or without feeling.

Not too many written notes, granted, but a lot of photographs taken! At this point I was in debate of whether I should call the assignment done – I had walked and documented enough and was feeling rather despondent. Upon arriving home I promptly transferred the images to my laptop. And as I watched my captured route pass so rapidly in front of my eyes, it moved me, and I knew I had to finish documenting the journey. Though I still wasn't sure what it would lead to.

That (not just two, but four-part) documentation turned into a short film and a rather significant learning experience for me as I was taught more about my walk afterwards, than during.

Mood Board for D2

IMG_9894.jpg

This is the mood board I created for D2. I want to imbue a feeling of a forgotten, though not neglected, garden that is found and tenderly loved. Also - a garden of gratitude….I think a space that includes a decent-sized vegetable garden, a kitchen garden, rain barrels, and an orchard….is a land of thanksgiving and gratefulness. So I aim to embrace these feelings and attitudes and infuse them into the lines I draw. 4 acres of wonderful!

Q&A: What Is Your Favorite Part About The Course Work?

I was asked this question just the other day by a friend - so I thought I would respond by posting my answer here.

What is my favorite part about the course work….wow. Huh. Well, I can't just keep it to one thing…so here's ALL my favorites….

We jumped - or were thrown - into the deep end from day one. There was no gradual build up really, we just did what needed to be done and learned through the process of doing and experiencing. And while there are informational (and enjoyable) lectures, the course is very hands-on - experiential, practical learning. For example, we never had a classroom lecture on how to take site measurements - we just went and did it and talked about it there. It seems we are able to learn and move through the design process and produce fantastic work in such a short period of time because of this diving-in-and-really-doing-approach. 

The feedback, encouragement and attention from the tutors and instructors is fantastic. Being just 9 in the full-time studio we normally have 2 and sometimes 3 tutors hovering around the room - that means we get the attention we need to really dig into our designs and discover what's working, what's not so much - and what could be done to resolve our dilemmas. Positivity abounds while receiving feedback, even when it's frankly not working. It's a very motivating and open environment. Plus, your work is really your own, while the instructors effectively guide you along and give suggestions, they want me to find me in the design, and not them. They don't force their ideas upon your work. 

Also - as an addendum to this section - I must say that the tutors and instructors themselves are marvelous individuals who are a joy to be around. They are fun, funny, interesting and really care about us and our work. You can feel their genuine souls and that makes a difference. 

We have tea time! 11:15 am - we break for tea. I believe the creative mind needs negative space in order to maintain it's fluidity of expression. Plus it's seems so hobbit-like to have tea-time…it's basically second breakfast!

(And as I briefly re-read through this, I am reminded of elementary school…what's your favorite subject? Recess. Wasn't that always in the top two?)

I am challenged every single day. For someone who has been in the landscape design business for over 8 years, the fact that I am fascinated and challenged every single day THRILLS me. I feel like I am learning how to be a real designer! From creating mood boards, to building models, and pushing the grid process over the edge…I am developing wonderful skills and learning the most effective process for me - Lorien - to move forward and produce effective and sincere designs. Ah! It's the best. 

The Inchbald is my home away from home. And while this has nothing to do with the coursework - it has everything to do with life and living happily! I adore the people I share the studio with and those who teach us, they are my family while I am here. It's been just over two months since school started, but I am already going to miss them come end of July - ugh - I don't even want to think about it! 

Study and learning is also researched-based. Being based in London, we have incredible references all around us - be it paintings, parks, architecture, you name it! We frequent museums and public spaces to gather information that we can add to our memory bank, sketch books, and picture library - we have mini-assignments that exercise our brains and push us into thinking that goes below the surface that is so easy to stay above.

Postgraduate work is such a blessing. Every Monday we gather at 3 pm to discuss, debate, and explore ideas, theories and experiences from philosophy, studies, reading assignments, our own design work….talking it out and exploring through words with others is enlightening. I always walk away with great insights, information, and questions to consider. Plus I am keeping a Postgrad Journal where I am recording this year through mostly reflective writing, and that has been fun and interesting to work on. 


There are probably more 'favorites' - but these will do for now! I am so happy - I love what I am learning and experiencing. Every day I am so grateful for my time here. It's an amazing adventure and I hope to effectively apply myself each day so that my potential can more fully come to fruition.

Cheers all around!

Having fun exploring curves!

Having fun exploring curves!

P.S. If you have a question about my time here in London - or anything really, email me and I may answer it on my blog!

D1 reflective writing about the design process

PG Reflective Writing on D1  

I guess you could consider this a condensed version - or an abbreviated version of the D1 process post I wrote and recently published. But both "reports" needed to be produced, so I will go ahead and post this one as well.


Grid -> Model -> 2D -> Pegging It Out -> 2D


Grids, Grids, Grids

This is the part of the process that gave me the biggest headache literally. My head was hurting so badly after I finished with all of my grids, I think I went and bought some aspirin! I remember coming to the point of delirium and I couldn't tell if what I was doing was leading towards anywhere positive or not. It's a good thing Andrew and Marcus were there to tell me which ones to develop further. I do remember thinking, “if I use this process after I leave the school how will I know which grid to explore and use without someone telling me?” I was concerned.

I am not sure if I would have chosen the grid that Andrew and Marcus selected for me had I been on my own. I really don't know what would have happened or which direction my grids would have taken – I don't think I would have done as many grids as I did, but I am learning the value of persistence and exploring in the process.

In the end, I was grateful for the guidance and I enjoyed the result and the process. As I was thinking the other day – Process is Progress!


Moving into Model: Cardboard @ 1:100 / Foam Core @ 1:50 / Photos

I had never made any kind of model for any design I had done so I was very excited about this part of the design process – and that we were exploring with model so early on, even before we could think about gardens (sure, sure). The models were a challenge for me. I started out using cardboard at a scale of 1:100 and focused on positive and negative shapes and tried to focus on mass and void as well (which was the point?), though I felt rather inhibited by the cardboard in creating mass especially. It was at the 1:100 scale that I resolved the overall motivation for my garden, but felt like I was blocked by the small scale I was working with. When I moved to 1:50 I brought some foam core to work with, which was MUCH easier to cut. And while I was able to develop my model a bit further by way of structures and existing tree placement, I still felt frustrated in creating mass and void. I did not have the patience to cut out the same shape 10 times just to create height. Also – I couldn't see it in my minds eye, I couldn't see via the model where there should be mass and void and that was frustrating to me, because I believe that mass and void are very important elements in design and a space, especially a garden. I remember staring into the space, waiting for it to tell me something, but it never spoke. Once I reached my limit with the foam core model at 1:50 I needed to go back to the paper/2D to get my mass and void (kind of ironic, I think).

Looking back I am still not sure if I nailed mass and void in my design. I can see visions of my design, but the vignettes that flash through my mind...have I captured them on paper? I suppose a 3D computer system would help me decide that. But I want to be able to see it and know it on paper. I think that is something I will make a conscious effort to create in my designs this year – effective mass!! And void!!


Back to 2D

After the models were completed (or as far as I could take them with my patience) I went back to paper and developed the skeleton of my design (now being allowed to think of it as a garden). It was here that I was able to better push and pull with the mass and void, define obscure areas and also make some practical decisions. Soon enough I had a semi-final layout that was ready to be pegged in the square to see how it was working in reality.


Pegging It Out in Eccleston Square

I knew what I had come up with on paper wasn't working for me 100%...there was a nagging that I couldn't quite shake or resolve, but I didn't know what to do. When my turn came I was curious, nervous and anticipatory. And while I enjoyed this part of the process, it was a disappointing day for me in that what I had prepared on paper didn't work fantastically in the real world. I knew beforehand it wasn't working...and pegging it out only confirmed that. But it was through creating it in real life that I was able to know that the seating area needed to be larger, the pond a tad smaller...and that is what made the difference, pegging it out made the difference.

I do need to add here that the day didn't quite end in too much disappointment, read on to see why...


Resolving Concerns – Back to 2D!

Once I was done with my “pegging out” I was motivated to do some twisting and turning in my design back on paper – with the dining area and the pond especially. And it wasn't too long before I came to a resolution I could live with, that the garden could live with! It was a relief and I knew I had it when I did. I was back in the saddle!


Overview

  • Creating (many) grids led me to positive and negative space, the beginnings of mass and void.

  • Model helped push that agenda further and started to define strong elements in the garden.

  • Once I was blocked there I moved back to paper to develop the spaces in 2D, now thinking of it as a garden (although I was earlier) – still struggling a bit seeing mass and void.

  • Once I exhausted that process – pegging it out confirmed my uneasiness about some areas of my design, but it also helped me pinpoint where the problems were exactly.

  • Back at the drawing board, I was able to come to a design resolution that I was happy with.

The process of moving between design methods, for me, was a really great way to break through designer's block, which I seemed to run into in each method of the process. It allowed me to consider ideas that otherwise, would have gone unthought of. When did I have my eureka moment? I am not sure – it seemed that each stage of the design process had a eureka moment – I can't say that my design would have been as successful if one of those steps had been omitted. Receiving guidance from Andrew and Marcus also proved invaluable. 

Royal Academy of Arts: Australia

Today for the second part of school we went to the Royal Academy of Arts and saw the Australia exhibit. It was wonderful! Here's a 30 second promo:

Terms I wrote down while observing the artwork (Not all - but many of these orbit around the indigenous work): 

  • Mosaic-like
  • Dreams/Dreaming
  • Repeated Patterns
  • Fine Textures
  • Spirits
  • Sacred
  • Ancestral (Lands)
  • Energy
  • Dots and Lines
  • Lines and Shapes
  • Earthy
  • Dry and Arid
  • Synthetic Polymer Paint on Canvas
  • Natural Earth Pigments on Canvas
  • Red, Tan, Black, White
  • Black, Cream, Tan, Red-Brown
  • Golds/Yellows
  • WHITE (dots and lines) (and mixing colors with white)
  • Sky Blue, Ochre, Sage, Putty
  • Light and Shadow
  • Atmospheric
  • Rose, Greens, Tans, Yellows
  • Pink, Green, Blue, Purple
  • The Edges Which Fire Creates

I did note that there was a golden or yellow-based quality to many of the pieces. I believe that must have to do with the natural lighting that exists in Australia? I have never been there, and have had minimal tugging at my heart to go…but I think I would feel very at home in the landscape. It's an adventure I want to have. 

I also noticed, after leaving the indigenous room and moving into a later period when Australia was being colonized and had English and then German influences - how the emphasis on light and shadow played into the artwork (many were oil paintings) - many times a dark foreground, with the light in the background. I don't know if this was typical of that era and style in German painting and so it seeped over as they migrated south…that would be my guess, but I could be wrong. I do like this technique however and have always been drawn to light and shadow in paintings since I was very young.

How can I incorporate that element effectively into the garden? I ponder that - and I believe it will be a driving force for my next design.

Below are some of the pieces shown in the exhibit - though funny enough that none depict that strong dark foreground with the light in the background.  

The first image is a still from an 8 minute video of Shaun Gladwell riding in the Mundi Mundi - which did pull my heart (I have a thing for small machines and riding gear - and raw landscapes).  It's the introduction to the entire exhibition and I feel it set the mood well. 

Black Iris

It's not really it's time of year...but I included it into my planting scheme for Design 1 and so it's on my mind... 

iris-black.jpg

Danny and Annie

This has nothing to do with design, or gardens, or plants...but it's too sweet not to share. 

D1 Process

D1


The Design Process

by

Lorien Hall

Inchbald School of Design

October 28, 2013


A framed view into the thinking waters where the twisted and reaching branches of a silhouetted Hamamelis reflect; deep in meditation. A rising rusted wall echoes from behind.

Gravel pathways ask me to wander, calling back to the fields and river beds that once existed.

In the late afternoon and into the evening a meal is shared with laughter as the sun filters through the canopies of Birch and Pagoda Trees, captured and held by the grasses that move gently with the air; a clearing in the woods.

Underneath a striking angled roof, a pot is thrown behind walls which opens to the surround of foliage and flowers. Close by a book is read lazily from a swaying hammock.

Tall towering Yew protect and guide while coming and going, and sculpture mimicking a low wall always says hello.


D1: The Design Process

Contents

  • Site Visit to the Wear Residence

  • Creating the Brief

  • Mood Board: What it was Meant to Be & What it Became

  • Drawing up the Site Plan

  • Grids, Grids, Grids

  • Moving into Model: Cardboard @ 1:100 / Foam Core @ 1:50

  • Pegging it out in Eccleston Square

  • Adjusting Spaces on Paper/2D

  • Plant Research: Weekend Visit to Kew Gardens

  • Plant Selection: Developing a New Plant Palette

  • Plant Placement

  • Final Design Decisions

  • Line & Rendering Techniques

  • Breaking Designer's Block: Dancing in Hyde Park After Dark By Myself

  • Continuing with Rendering Techniques

  • Materials Board

  • Final Colored Pencil Rendering


Site Visit to the Wear Residence

During the visit two main tasks occurred: 1) talking to Alison Wear about her garden and goals so we could create a brief for the design, and 2) taking measurements of the site so we could develop a site plan.

The first part was very interesting to me. We were there as a group and were free to ask any question which we felt would help us understand her, her way of living, what she wanted for her garden by way of items and feelings. I probably did the least amount of questioning and found that it was either hard for me to think of intelligent questions that I felt were very effective, or because of the amount of people there, it was hard to get a word in when I tried. But I learned so much about Mrs. Wear, and about the process of questioning by observing all the others submitting questions – I felt that a lot of good ones were asked. After that interaction I decided that something I wish was better at is questioning and conversing with the client...following their answers down the rabbit hole to see what's really there.

I also paid attention to the interior of the house. Though looking back now – I feel like more could have been done with my design to pull what I saw inside out into the garden. But then again...should a garden be a direct reflection of the interior? Or even the client? While I think a garden should compliment it's owner/caretaker/guardian – I do not necessarily think we are meant to design gardens which are a replica of the client. A garden, for me, is like a member of the family, or a friend. They have their own personality – and sure, you may be related, but you're not each other, but better because of each other. I did wonder about this idea in the beginning stages of the design process, and I think that it lessened the chain I could have felt to make it a “Mrs. Wear” garden, per se.

The measuring out went well with our group. We were all willing to work together and resolve different ways of preferring to pull measurements. In the end we were delivered a list of measurements with no or little errors (from what I could tell). I would obviously prefer to receive a survey for any site I develop a design for, but seeing how that might not always be the case, I would like to have someone there with me helping to hold and pull the tape. I think it would go much quicker....maybe that's what you have an intern for.


Creating the Brief

A short time after the site visit we met back at the school in the lecture room to discuss our experience with Mrs. Wear and what we learned about her and to create the brief. Maria had taken very good notes, so much of our list came from her. We divided the information we gathered into two sections: 1) objective, and 2) subjective. From what I got out of it – the objective where items that we were (almost) definitely suppose to include/accommodate for in our design, the “must haves”...of course, you could negotiate on some things I am sure, but for the most part...the list on the objective board were to be included in the design.

The subjective board was filled with items that were open to interpretation of what we thought Mrs. Wear wanted as far as feel, mood and ambience. It also included things she likes, for example, rust. It was up to us whether or not we would incorporate these items or moods and how we would do so. A few things that she said which I ran with to develop my design were...water, rust (corten), meditative, sunlight, sculpture, humor, reflection, calm but not bored....all of these elements are now present in my design, or hopefully are. Something I wish was more strongly presented in my design is turning the entire garden into a sculpture itself – think land-art...it seemed like a good challenge and one I wanted to really tackle and develop, but I am afraid it got away from me. For the better I am not sure.


Drawing up the Site Plan

The next step was to take the measurements from our site visit and create a base, a site plan – from which all drawings would be based. Between the two groups this went well and the site I would say came out fairly accurate, I thought? I had a devil of a time understanding how to use the scale!! And after years of being able to use a scale just fine, this was a bit weird for me. And while I eventually got the hang of it – I am still learning what a space feels like when we are talking about meters, centimeters, and millimeters...I think there are still a few more battles to be had with the scale.

We first created the site plan at 1:50 (when really, what does that mean?! I still don't know! One of what equals 50 of what!? Are we talking centimeters or millimeters? Neither?) - then we created a site plan at 1:100.

I was satisfied when this was done.


Mood Board: What it was Meant to Be & What it Became

For me, creating the mood board was a visual extension of the subjective board we wrote out as a group. More or less anyway. We were supposed to gather images which evoked the mood we were going to try to capture in our garden – it could be anything from plants and garden to fashion and paintings. I started out by purchasing several magazines...garden, fashion, more garden, home and garden...and after getting home and flipping through them I was disappointed that my purchases seemed fruitless. But I leafed through them several more times, trying to be more patient and open minded. I did end up using four images from the magazines, which really did make a difference in the end.

After the magazines came the internet!! I googled and googled and saved many images to my desktop that I wanted to throw at the garden. I was doing this late the night before the mood board was due, and normally would have like to have taken more time and put more thought into it, but I was still living in my friends lounge and spending a lot of time looking for housing and getting over jet lag, so the first few assignments felt like jumping hurdles (even though I think this whole year will be jumping hurdles really). When the time came to print the images they started coming out really blue and a cool-colored yellow...ink shortage!!! There was nothing I could do about it at that time and in defeat I didn't finish printing the rest of the images and just figured I would add them later (that never happened).

The next morning I arrived at school and in a slightly embarrassed manner pinned up the four magazine pages and the several poorly-printed images on my wall. When it came time to present my mood board I briefly explained what had happened with the ink and the printer...but it was well-received nonetheless. The words spiritual, mysterious, and challenge were used so I decided to leave the board as is and run with it.

In the end I am really glad my “happy accident” occurred. Serendipity. As I look back at all the other images I wanted to incorporate...well – I am just glad I didn't! In the future I will be more loose about my mood board. I think the thing for me is to not think too much about it or read too much into it. Otherwise it may become very contrived and who wants a contrived garden? I do not. I need to just let it happen and relax a bit. Sometimes mistakes are exactly the right way to go.


Grids, Grids, Grids

This is the part of the process that gave me the biggest headache literally. My head was hurting so badly after I finished with all of my grids, I think I went and bought some aspirin! I remember coming to the point of delirium and I couldn't tell if what I was doing was leading towards anywhere positive or not. It's a good thing Andrew and Marcus were there to tell me which ones to develop further. I do remember thinking, “if I use this process after I leave the school how will I know which grid to explore and use without someone telling me?” I was concerned.

I am not sure if I would have chosen the grid that Andrew and Marcus selected for me had I been on my own. I really don't know what would have happened or which direction my grids would have taken – I don't think I would have done as many grids as I did, but I am learning the value of persistence and exploring in the process.

In the end, I was grateful for the guidance and I enjoyed the result and the process. As I was thinking the other day – Process is Progress!!


Moving into Model: Cardboard @ 1:100 / Foam Core @ 1:50

I had never made any kind of model for any design I had done so I was very excited about this part of the design process – and that we were exploring with model so early on, even before we could think about gardens (sure, sure). The models were a challenge for me. I started out using cardboard at a scale of 1:100 and focused on positive and negative shapes and tried to focus on mass and void as well (which was the point?), though I felt rather inhibited by the cardboard in creating mass especially. It was at the 1:100 scale that I resolved the overall motivation for my garden, but felt like I was blocked by the small scale I was working with. When I moved to 1:50 I brought some foam core to work with, which was MUCH easier to cut. And while I was able to develop my model a bit further by way of structures and existing tree placement, I still felt frustrated in creating mass and void. I did not have the patience to cut out the same shape 10 times just to create height. Also – I couldn't see it in my minds eye, I couldn't see via the model where there should be mass and void and that was frustrating to me, because I believe that mass and void are very important elements in design and a space, especially a garden. I remember staring into the space, waiting for it to tell me something, but it never spoke. Once I hot my limit with the foam core model at 1:50 I needed to go back to the paper/2D to get my mass and void (kind of ironic, I think).

Looking back I am still not sure if I nailed mass and void in my design. I can see visions of my design, but the vignettes that flash through my mind...have I captured them on paper? I suppose a 3D computer system would help me decide that. But I want to be able to see it and know it on paper. I think that is something I will make a conscious effort to create in my designs this year – effective mass!! And void!!


Pegging it out in Eccleston Square

So I am seeing that I am a little out of order here. After the models were completed I went back to paper and developed the skeleton of my design (now being allowed to think of it as a garden), before pegging it out. So photographs of that part are probably shown in the next section.

Basically, I knew what I had come up with on paper wasn't working for me 100%...there was a nagging that I couldn't quite shake or resolve, but I didn't know what to do. Another block! Another frustration!

I was third to go – the first two gardens (Graham and Sarah) I felt worked really well and I was very excited for them. When my turn came I was curious, nervous and anticipatory. And while I enjoyed this part of the process, it was a disappointing day for me in that what I had prepared on paper didn't work fantastically in the real world. I knew beforehand it wasn't working...and pegging it out only confirmed that. But it was through creating it in real life that I was able to know that the seating area needed to be larger, the pond a tad smaller...and that is what made the difference, pegging it out made the difference.


Adjusting Spaces on Paper/2D

So this section should fall before and after pegging out my design...but we're all good.

So, I am done with my “pegging” and after some twisting and turning I finally came to a resolution I could live with, that the garden could live with! It was a relief and I knew I had it when I did. So just as an overview:

  • Creating grids led me to positive and negative space, mass and void

  • Model helped push that agenda further

  • Once I was blocked there I moved back to paper to develop the spaces in 2D, now thinking of it as a garden (although I was earlier)

  • Once I was stumped there – pegging it out lead to a resolution, once again

  • Now I am back at the drawing board, resolving issues on paper. Checking my scale always, but not always understanding what it means.

The process of moving between design methods was a great way to break through designer's block. It allowed me to consider ideas that otherwise, wouldn't have gone unthought of.


Plant Research: Weekend Visit to Kew Gardens

All I can hear is Marcus telling me I spent too much time on my plants. So I decided to spend even more time and go back to Kew on a weekend and study more plants!!!

The time there was helpful – it didn't answer all my plant palette questions or even resolve the soul of my planting scheme (more like my planting problem at the time) – but it did lead me to my answer in the end. And so yes, it was worth it.

I paid attention to some of the areas we visited as a class, and then off to the grasses!!! As I knew grasses were an important part of my design.


Plant Selection: Developing a New Plant Palette

I hit a low in the design process with my plant selection phase. And while it is only 5 points for the project (therefore I shouldn't overdo it) - I thought, “how can I stay with the plants I originally chose from Kew when they don't fit my mood board at all? Then what am I trying to achieve?”

The plants I had gathered from Kew were great as a palette in and of themselves, but when I matched them to my design, so many of them didn't belong. Was the list I created at Kew wasteful? Not at all! I actually ended using the Hamamelis, Iris, Anthriscus and Anemone...so four. Not too bad. It was an excellent exercise and gave me a base.

As I was wrestling with the original plant palette I had all the photos laid out on my drafting table. Glancing back and forth between my mood board and my plants laid out before me I became quite despondent at the lack of connection.

In walks part-time student Eileen.

I shared with her my dilemma and she agreed.

Eileen seems to have a sensitivity for plants and their textures. She pointed out that my mood board was very textured and so I should try to pull that out in my plants – and the coloring should be cool....silvery even, which I had thought of earlier. She gave me a list of plants to look up and talked about each one and why it would fit with my design. Once I got home I started googling the list and was excited about her suggestions. After mixing her ideas with mine, I feel that though I may not have the best plant palette for my space, I have a very decent one. And that is good enough for me at this point!

What I learned through this experience was the value of knowing your plant material. Really knowing plants – what they are like, how they grow and how they react to different situations. You can make much more intelligent palette choices when you have more options to work with.


Final Design Decisions

With my layout finally resolved – and feeling better about my plant selection and where the major players were going, I moved into the final-design-decision stage which included adding the furniture, deciding heights of walls, steps, etc., and selecting hardscape materials. Even though I found that some of these decisions (mainly heights) were still being decided upon while labeling, etc.


Plant Placement

At the beginning of placing my plants I figured I needed to know exactly what was going where.

At the end of placing my plants I concluded that I just needed to know my trees, a few key structural shrubs and all else could just be...

And that was that.

Done.


Line & Rendering Techniques

I was encourage to stick with pencil for this project. I felt fine about that and at first, thought it would buy me some time and make the process simpler and easier for me. I was wrong! It was a great challenge!

I first started creating plant symbols that I was familiar with, but I was told to loosen up – which even though I desperately wanted to – I was having a hard time doing so. It seemed that when something didn't matter or didn't “count” in my mind, then was I able to be free and my line quality reflected that relaxed state I was in. But the moment I was doing something “for real” I had a devil on each shoulder telling me I couldn't do it well enough.


Breaking Designer's Block: Dancing in Hyde Park After Dark By Myself

I was in a funk at this point and feeling very wound up. I kept thinking how I will never make a great designer and that I didn't know what I would do with my future. I know this sounds quite melodramatic, but that's really how I felt. I was very discouraged at my inability to create something I felt had value. I had already forgotten that process equals progress.

So I went for a run in Hyde Park to unwind.

After half-running around the park I left the path and ran into an open field. It was getting dark and the large silhouettes of the surrounding trees encompassed me. I sprinted up the field as fast as I possibly could – running out all of my frustration and tension (and breath). I flew.

I jogged back down the other side of the field where the grass had grown long. I had my earbuds in and then after some moments of hesitation I started dancing to the music. It's what my body wanted to do. Dance, dance, dance! Although it was more like flailing my limbs around without much reason, although I did stay with the beat. I did that for a good while. Then as I moved around the park to other areas I would start dancing at will. I just wanted to throw out all my pent up perfectionism that was tying me down. So I did!

This won't be the last time I go dancing in Hyde Park I am sure!


Continuing with Rendering Techniques

The next day I had a better attitude and was able to continue with my line work and rendering techniques in a more relaxed fashion. I think dancing in the park paid off! I decided to take away all borders that were diving the gravel from the plant beds. Not only does Mrs. Wear seem like a person who doesn't have tight boundaries in her life, but her garden didn't seem to want it too much either. Besides, my design had a lot going on already and I needed to find ways of simplifying. After taking the edging away, I was able to work with the shapes of the plants in a more organic way. I didn't push this as far as I would have liked to, but I am happier with how the planting areas turned out.

While working out my line work I think I redrew my entire plan 3 or 4 times.


Materials Board

For my materials board I used the images from my mood board, images of my final plant selection and images of the hardscape elements (including water). I found the materials board valuable because I was able to see if it all felt cohesive...from beginning to end. And for the most part, I think it works. Although with a little more collaboration or research, I feel I could have made a stronger connection to my mood board.

I can see though, in the future, I am going to have to be careful about becoming obsessive with everything working perfectly together. But I hope with time and honest practice, I will become better at “seeing” - which is what I think so much of garden design is.


Final Colored Pencil Rendering

Hallelujah!!! Almost finished!

After scanning the pencil drawing I had created on trace paper, I imported the file into Illustrator where I had created an information block and labels on an A1 sheet. I then had that file printed at Hobs and that is what I colored on.

I had figured out the approach I was going to take with my colored pencils earlier, so this was just sitting down and doing it!

Did it turn out exactly how I would have liked? No – there are a few line weight issues, a few shadows forgotten or portrayed inaccurately...but this is the first time I have ever rendered a plan this way, so at the end of the day I am very pleased with the results. Happy! Yeah! I feel I can work with the style and develop it a bit further pushing it into a more professional realm. And that will make me very happy.

Ron Arad

I came across this video the other day and I thought he had some good lines to remember. 

Some favorites:

"The current thing I am working on is my favorite - and what I haven't done yet is even a better favorite."
"Sometimes the material looks for a function, sometimes a function looks for a material."
"What are you about? What's good about what you do, and what can you teach us that we don't understand yet?"

Calvary and Guards Club - Autumn Lecture

The Entry Hall

The Entry Hall

If we look back we are dying on our feet.
- John Makepeace

This past Thursday we were invited to attend a private lecture at the Calvary and Guards Club which is near Hyde Park Corner. Dress code was men in suit and tie, dress smart, absolutely no jeans and no trainers - failure to the observe the formal dress code would result in denied entry. 

The evening was outlined as follows:

6.15pm gather in the Waterloo Room

6.30pm Lecture in the Peninsular Room, followed by Q&A

7.30pm Drinks in the Waterloo Room

The evening was fabulous and I loved what I learned during those few hours. Lecturers were John Bly and John Makepeace.  

John Bly is the resident furniture expert on BBC Television’s Antiques Roadshow since it started in 1978, and has his own ITV programme Heirloom. The Bly family have been dealers in Tring, Hertfordshire since the beginning of the 19th century and John Bly worked for four years at Sotheby’s before joining the family firm. He lectures in Britain, Europe and North America and writes for a variety of specialist magazines. He has written and edited 14 books related to antiques.

John Makepeace is a renowned furniture designer and maker. Early professional recognition led to his work as a design consultant to the all India Handicraft Board, a founding member of the Crafts Council in the UK and a Trustee of the V&A, London. Early commissions from Templeton and Keble College, Oxford, and Liberty’s were followed by major museums, corporate and private collections around the world.  

In 1976 he bought Parnham House, Dorset to set up a college alongside, but separately from, his own furniture studios. Parnham rapidly gained an international reputation. Following the sale of Parnham in 2001 he purchased Farrs, a listed house in Beaminster, and here he and his wife, Jennie, now have their home, gardens, design studio, gallery and timber seasoning for current and future commissions. 

John Makepeace was awarded an OBE in 1988 for services to furniture design and in 2002 received the American Furniture Society’s Award of Distinction.

FROM MY NOTES

  • We are like trees - we grow from the inside out. We weather, show sign of our age 
  • The hidden beauty of trees - it's inside, it's revealed when we cut into the tree.
  • Disclosed and revealed beauty
  • There's nothing in life that isn't reflected in furniture
  • 1 - material, 2 - use/function, 3 - shape, 4 - decoration, 5 - manufacture
  • Age of timber...first, oak. Second, Walnut. Third, Mahogany. Fourth, Exotic timbers
  • 1700's staff would bribe the dinner guests because as they drank alcohol during the meal they would become indiscreet. To fix this they had the servants leave after the food was served and that's when self-serving furniture/pieces were created. 
  • How will your designs reflect your pattern of life? And the patterns of life of your time? 
  • Furniture fulfills four functions: sit, support the body at ease, tables (the floor raised off the ground) and cabinets/storage (added level of protection) 
  • Structure, Expression
  • Anything looking backwards has no future
  • Design is about constant innovation. Nothing remains the same. 
  • If we go back we are dying on our feet. 
  • New
  • New opportunities
  • Equals new inventions
  • In regards to clients: What they are trying to say instead of what they are saying
  • Repeating doesn't lead to innovation and invention
  • Trends are superficial
  • Find something personal

Wandering the building

Wandering the building

What I Listened to Every Day During the Design Phase of Rivendell

When I started designing the landscape for Rivendell I chose a segment of a song from The Fellowship soundtrack and I listened to it each day (over and over and over) I designed during the fall of 2007. As I would turn off of White Pine Canyon Road and onto White Pine Lane I hit play - as I walked around the raw site and the unfinished house I hit play. As I moved my pencil across the site plan developing my thoughts, I hit play. I even made the builder listen to the music which was driving and inspiring my design.

I wanted the installed landscape to move me the way the segment of this song moved me. I wanted to capture that moment of crescendo and infuse it into nature. And after all these years of growth, I believe it does just that.  

I must be missing Rivendell today. 

DSC_0064.JPG